How to achieve a blurry background, even with a kit lens – Ep.30
How to achieve a blurry background, even with a kit lens – Ep.30
How to achieve a blurry background, even with a kit lens – Ep.30

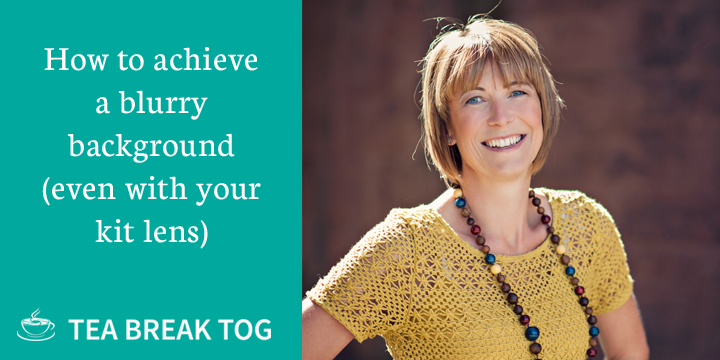
How to achieve a blurry background, even with a kit lens.
Today we are going to nail down the four things you need to consider if you want to achieve a blurry background in your images, even with a kit lens.
It is no secret that most beginners really hanker after that gorgeous blurry background you see in lots of professional photography. We refer to those ‘out of focus’ areas as our ‘bokeh’.
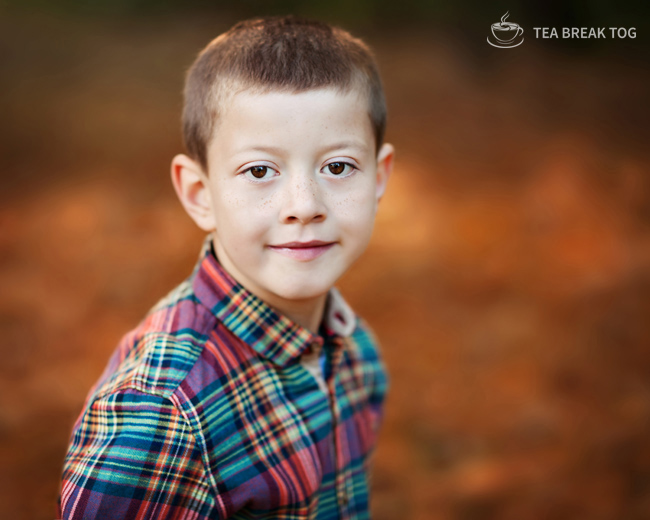
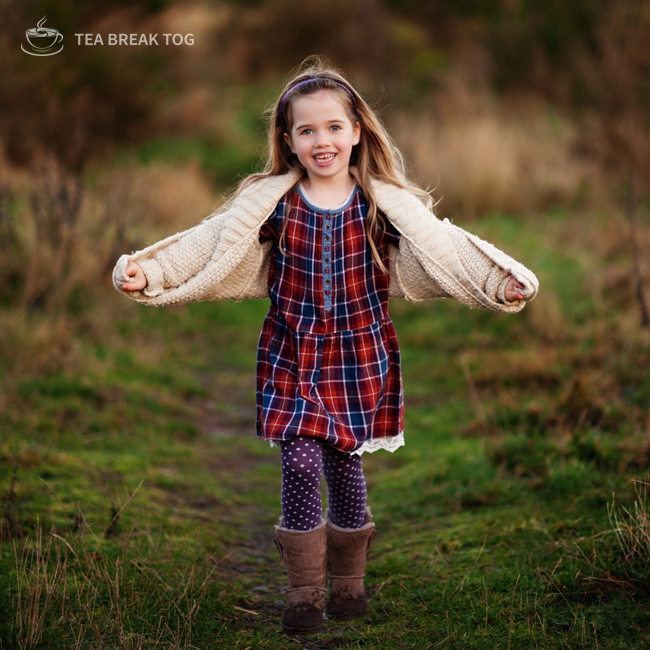
It is a common way of shooting lifestyle portraits because often the background in images like these can be quite distracting. I do a lot of photography with children and families outdoors and if I am trying to really capture the essence of that family I definitely don’t want the background to be distracting the viewer from what really matters.
You will also see a blurry background used to great effect in lots of other genres of photography: wildlife, nature, pets, cars, sports (I could go on). The reason the photographer has blurred out the background is usually the same – to draw attention to the subject and reduce distractions.
I love this look and I use it a lot. However, I do also think it is easy to get stuck in a rut shooting this way and this has definitely happened to me several times over the years. A blurry background looks great and it is necessary at times but remember to look around you for backgrounds which are crying out to be in focus too – that’s a good subject for a future podcast actually, so stay tuned!
I run monthly workshops for beginner photographers and lots of them come along saying that they love images with sharp subjects and blurry backgrounds and want to be able to create this look in their own photography. I can absolutely identify with it too because it was the number one thing I wanted to produce when I got my first DSLR and started learning photography.
So today I am going to tell you how to achieve this look, even with a standard 18-55mm kit lens.
Firstly, let’s discuss aperture. If you are a TBT podcast listener then firstly, thank you and I love you, and secondly, you will already know all about aperture and how it affects your depth of field. If not pop back and listen to episodes 2 and 3 for detailed aperture information.
The wider the aperture you select, the shallower your depth of field will be.
Depth of field is simply the distance of sharp focus in your scene.
When you select a wide aperture you are reducing this distance of sharp focus. So a ‘wide aperture’ is one way of trying to achieve a blurry background. But believe me, it is most definitely not the only way.

There are other factors to consider.
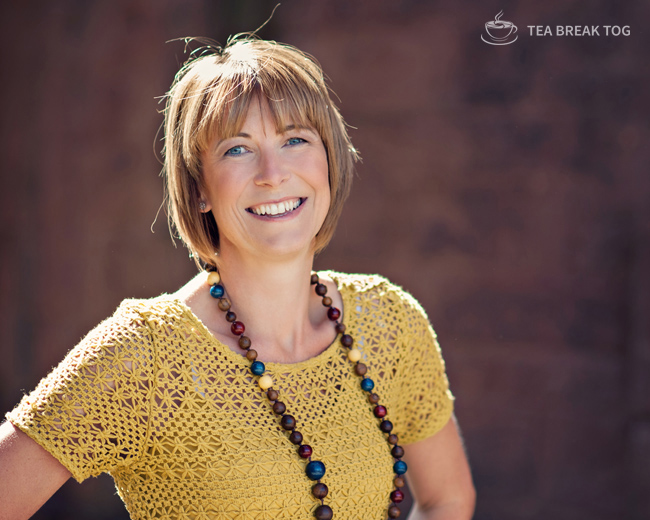
Let’s imagine that you are taking a photograph of your friend in the park. Let’s say that you have a kit lens on your camera – the good old 18-55mm lens which came with your DSLR. You are zoomed in to 55mm and the widest aperture your lens will allow you to shoot with at this focal length is f/5.6.
If you are a true beginner and this means nothing to you then the best thing you can do right now is sign up for my ‘Auto to Manual for Beginners’ course. It is FREE and after 11 short sessions you will be amazed at how far you will have progressed!
Now f/5.6 is not that wide an aperture considering other lenses can open to f/1.8 or even f/1.2. But that doesn’t mean you can’t achieve a blurry background if you understand the other factors which contribute to this.
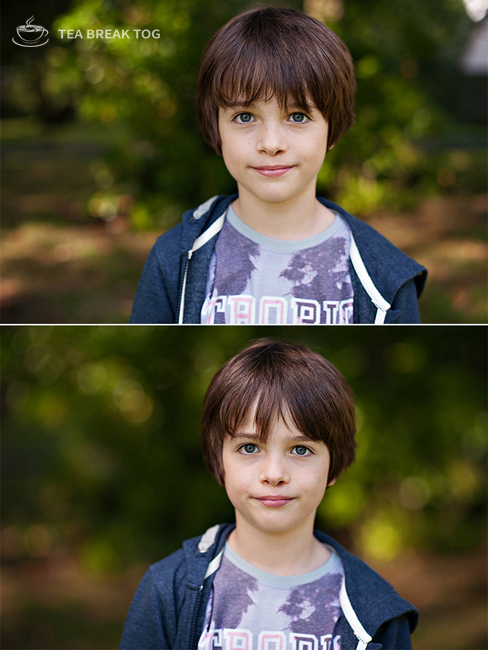
So you have placed your friend in the middle of the park far away from any distractions. First of all you stand just one metre away from him and take a head and shoulder shot of him. Then you move 10 metres away from him and take a photograph with the exact same exposure settings. Your aperture is still f/5.6.
You are obviously going to have much more of him in this second shot and much more of his background but I also want you to think about your depth of field. Think about the distance of sharp focus in your first shot compared to your second shot.
You have moved away from your subject creating more distance between you both. Increasing this distance from your subject means that you also increased your depth of field.
That means you can use the exact same aperture width and get totally different depths of field. How? Just be stepping back from, or closer to, your subject.
Stay with me.
If there is more overall distance in your scene then there is more depth of field in your image.
If there is less overall distance in your scene then there is less depth of field in your image.
So if you are keen to achieve a blurry background then how close you are to your subject plays a very important role. Especially if you have a lens that doesn’t open as wide as you would like.
Does that make sense? If not, back up and read over it again.
But there’s more!
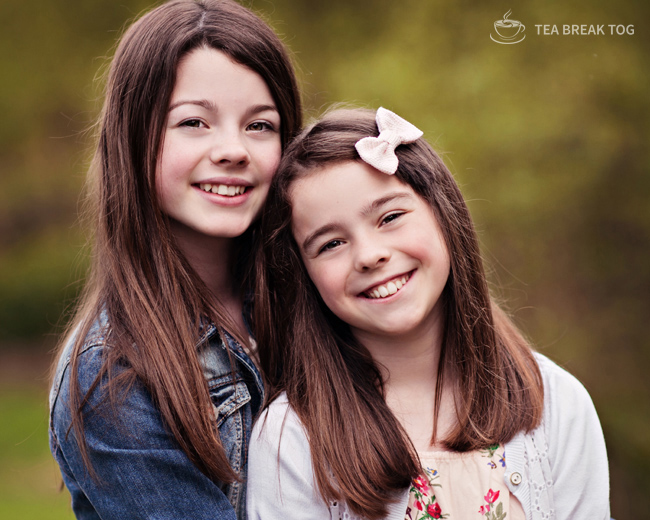
What about how close your subject is to the background? That’s got to matter too, right? For similar reasons. If your background is further away from your subject then it will be further away from the section of your scene that is in sharp focus, meaning it will be blurrier.
So making sure there is a good distance between your subject and the background will also help you to blur out that background further.
Lastly, and importantly, the focal length of your lens also affects your background blur. Let’s think about a telephoto lens. If you are a beginner working with an 18-55mm kit lens on a cropped frame camera then zooming in to 55mm is like shooting with an 85mm lens on a full frame camera due to the crop factor. This means at 55mm your kit lens is a telephoto lens.
I talk about the crop factor in episode 14 in case this is news to you. Check it out here.
We know that when we look through a telephoto lens we get magnification. Our subject appears closer to us than they actually are. But this magnification doesn’t just affect your subject, it affects your background too.
The background will appear to be closer to your subject than it actually is. Sometimes you will hear this described as ‘compression’ because that is exactly the effect it has on your scene. The whole scene looks like it has been compressed.
The distance between everything appears reduced.
The more compression you have in your scene, the blurrier your background will be. This is why so many portrait photographers, especially those who shoot in natural environments, use longer focal lengths. I talk about this more in episode 15.
My ‘lens of choice’ for portraits is my 85mm 1.4G because it gives me such beautiful compression. Many of my photographer friends shoot at even longer focal lengths than this using their 70-200 f/2.8.
Yes, using a high quality telephoto lens which opens wide will definitely give you better background blur in your images.
However, we don’t all have the funds to spend on such a lens, do we?
Well don’t despair…
If you are sitting there with your 18-55mm kit lens and you want to know how to take a photograph with a sharp subject and a blurry background, make sure of these four things;
- Zoom all the way in to 55mm
- Open your aperture as wide as you can (f/5.6 at 55mm)
- Create more distance between your subject and the background
- Close the distance between you and your subject
Do all four of these things and you will get the blurry background you are looking for. Will it be as creamy as one captured with a more expensive, faster lens? No. But at least you know it is nothing you are doing. You have to work with what you have for now.
If you have any questions or comments at all about this then get in touch! You can post them in the comments below or you can shout out on Twitter @TeaBreakTog. Alternatively, you can connect with me on facebook. I am always delighted to hear from you and have a conversation.
I’m back on Wednesday talking about composition again. Join me then!
The post How to achieve a blurry background, even with a kit lens – Ep.30 appeared first on Tea Break Tog.
From The Podcast
Tea Break Tog Photography Podcast
Do you want to improve your photography but are turned off by all the jargon, tech and science? Do you struggle to find the time to develop your skills?My name is Julie Christie and I host the Tea Break Tog photography podcast. My show aims to deliver straight-forward photography lessons, tips and chat to you every week. Episodes are short and focused meaning this is learning that will fit easily around your busy schedule. Let me help you to take control of that camera and capture stunning images!For more information visit www.teabreaktog.com. To get in touch simply click the contact tab on the website or tweet me @TeaBreakTog!Join Podchaser to...
- Rate podcasts and episodes
- Follow podcasts and creators
- Create podcast and episode lists
- & much more
Episode Tags
Claim and edit this page to your liking.
Unlock more with Podchaser Pro
- Audience Insights
- Contact Information
- Demographics
- Charts
- Sponsor History
- and More!

- Account
- Register
- Log In
- Find Friends
- Resources
- Help Center
- Blog
- API
Podchaser is the ultimate destination for podcast data, search, and discovery. Learn More
- © 2024 Podchaser, Inc.
- Privacy Policy
- Terms of Service
- Contact Us