How to hold your camera for sharpness – Photography for Beginners Series – Ep.35
How to hold your camera for sharpness – Photography for Beginners Series – Ep.35
How to hold your camera for sharpness – Photography for Beginners Series – Ep.35

How to hold your camera for sharpness – Photography for Beginners Series
This episode goes right back to basics! Do you know how to hold your camera for sharpness? That’s what is on the agenda today. Not just how to hold that camera of yours but also how to stand or crouch when you are taking photographs. When it comes to your technique, it is all about awareness. I’m going to really help you with this today!
This is a podcast episode – better to listen but, as always, you can read instead if you prefer…
Maybe you are thinking that this is way too basic for you.
You already know how to stand and hold your camera. You don’t need taught how to do this most elementary of things for goodness sake!
Well listen up if that is you. We all fall so easily into bad habits. Think about when you learned to drive and you followed all the guidance on how to place both your hands on the steering wheel at all times and how to feed the wheel between your hands to turn corners.
After you passed your test, how long was it before you had one hand on the wheel and were crossing your arms over each other to turn your car?
We are all guilty of this.
We forget the reasoning behind the most basic things we are taught in life and we end up finding easier, quicker or more comfortable ways.
Sometimes the ways we find are actually better for us or just as good and, if so, happy days. That’s great! However, sometimes the way we end up doing something is actually just lazy, sloppy and ineffective.
That’s all assuming you actually were taught in the first place! Many of you are self-starters and you teach yourselves as you go along. It may well be that you didn’t ever learn how to stand or crouch when you are shooting and how to hold your camera. Maybe you didn’t know that it actually mattered as much as it does. In that case, this episode is a MUST LISTEN!
As many of you know I teach beginner photography workshops every month in Scotland. I see 12 new learners every month and I absolutely love it! The images in this post are from a recent workshop, in fact.
Before I take everyone out in the afternoon for the practical part of the day, I always go over stance and grip. Most of the attendees have already fallen into bad habits just from their experience in automatic mode. They generally have no idea that stance and grip play such a vital role in the sharpness of your images.
And yes, I said VITAL.
Is stance and grip all that matters when it comes to sharpness? Absolutely no way! Hopefully I have made it clear by now that there are many things to consider when it comes to sharp focus in your photography. Your technique is just one of them. But it is an important one and it can be the difference between a sharp image and a blurry one, especially if your shutter speed is on the slow side.
I see photographers all the time with poor shooting technique. I can see the camera moving about as they try to capture beautiful photographs. They ask me why their images are blurry and I ask them;
‘How aware are you of what your body is doing when you are taking a photograph?’
Generally they look at me with a very confused expression. ‘Not very aware at all’ is clearly the answer.
And they are not alone. Most photographers are so caught up in the act of creating images that they just shoot, and shoot, and shoot with no thoughts about what their hands, feet, back and elbows are doing. Sure, they end up with lots of blurry images but their solution to that is just to take loads and loads of shots because they know some will turn out sharp.
The reason I know this is not just because I have worked with hundreds of learners. It’s also because I used to do this too!
But there is a better way, and it’s all about awareness.
Firstly, you must have an awareness of all the ways your body can ruin your attempts at a nice sharp image.
- If you are wobbly on your feet, your camera will wobble too meaning you have more chance of camera shake.
- If you are not supporting your camera and lens properly with your hands, your camera will move around meaning you have more chance of camera shake.
- If your elbows are out to the side, it is harder to keep your camera still meaning you have more chance of camera shake.
- If you compose with your camera out in front of you (using your screen instead of your viewfinder), your camera is more likely to sway meaning you have more chance of camera shake.
- If you are out of breath and your chest is rapidly rising and falling, your camera will move with it meaning you have more chance of camera shake.
- If your hands are shaking then your camera is shaking too meaning you have more chance of camera shake.
- If you support your camera just with your arms, they will get tired. Tired arms are wobbly arms meaning you have more chance of camera shake.
Sometimes we can’t prevent some of these things occurring. Maybe you are shaky. I have a pretty shaky grip myself. You might have a medical condition that means you have tremors or you are unsteady on your feet. Maybe you are out of breath because of what you are shooting. I photograph children playing a lot. I have to run about all over the place and I am often shooting whilst out of breath.
I am not in any way saying that you can’t shoot a sharp image if you shake or if you wobble or if you are out of breath.
What I am saying is that you have to be aware of the impact all of this can have. If something is causing you to wobble or shake or move a lot and there is absolutely nothing you can do about it then you need to make sure that you make every effort to minimize it as much as you are able to and you need to combat it in other ways that you are in control of such as ensuring your shutter speed is fast enough.
But let’s be honest. Often we are in control of these things. Often there is no reason that you couldn’t keep that camera steadier.
And that is the second part of the awareness you must have. The first is being aware of all the things that can cause your camera to shake and your images to be blurry. The second is having an awareness of what your body is doing the moment before you press the shutter button to capture that image.
Where are your elbows?
They should be firmly pressed in to your body and not out to the side. Why? The closer they are to your body the more stability you will give your camera. The further out to the side your elbows go, the wobblier your camera will become and the more tired your arms will become! Use your whole body to support your camera, not just your arms!
Where is your right hand?
It should be gripping the right side of your camera where your shutter button and exposure dials are. Why? Unfortunately, left-handed cameras are not exactly widely available. There are some but they are few and far between. Trying to reach across with your left hand would cause all sorts of camera wobbles!
If you are a lefty and you are listening to this episode thinking this is all very unfair. You are right! Why on earth are there not left-handed versions of more cameras?
You can have a look online at solutions people have found using adaptors and such. Or you can just accept it and get used to using your right hand.
Where is your left hand?
It should be cradling your lens – underneath the lens and not over the top or to the side. Why? If your left hand is over the top of your lens that means your elbow is out to the side (see above). Believe me the other reason your left hand should be underneath your lens will become very obvious the minute you attach a very long, heavy, telephoto lens to your camera. Those things need support or they will cause you to wobble about something awful…
What is your back doing?
It should be as straight as possible! Why? Your body must help to support your camera. If you are bent over you are allowing your arms to do most of the camera support but at the same time your poor posture will make your back ache later and depending on how much you shoot could lead to serious back problems.
If you need to get lower, bend your knees, rest an elbow on your thigh and keep your back straight. If you need to get super-low, lie down on the ground!
What are your feet doing?
They should be hip distance, or further, apart. Why? The closer your feet are together, the more likely you are to wobble. If the ground is pretty even then hip distance apart will do. If it’s uneven then going for a wider stance is a good idea. Finding a rock or tree stump to place one foot on can really help you get a steady stance on uneven ground.
How are you breathing?
You should try to keep your breathing as even and slow as possible. It is easy to get out of breath when you are shooting though, it happens to me all the time! If you do find that you are puffing a bit, just be aware of it and steady it for each shot. Sometimes if my chest is really heaving from running around I will very briefly hold my breath whilst I press the shutter button to steady myself.
Where is your camera?
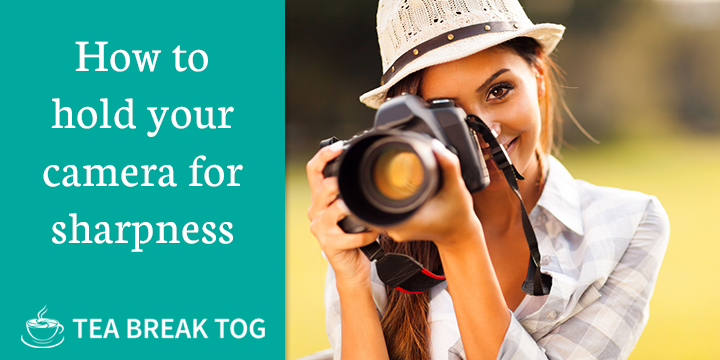
Preferably, it should be against your face as you look through your viewfinder. Why? If you hold it out in front of you and use your screen to compose the shot then it is nowhere near as steady as it is pressed against your face. You are leaving your arms to do all the supporting. When it is against your face with your elbows in, your back straight, your feet apart and your hands in the correct position then you are using your entire self to support that camera and keep it still.
I know some cameras don’t have a viewfinder. If you have one like this, just be extra vigilant. Don’t hold it out too far, keep those elbows in, straighten that back and widen that stance. You’ll be fine!
But that is so much to think about! I will never remember all of that!
Yes you will. Like I said, it’s all about awareness. Every time you take a photograph just take a moment to scan your body. It will take only a second.
Even better, go out for a few practice sessions with the sole purpose of improving your stance and grip. Make that the focus of your session.
If you work hard at this awareness for just a short while then it won’t be long until you never have to think about it again. It will be second nature to you.
Are you still thinking that this is all a bit over the top?
Humour me and follow the advice for a few weeks. If you don’t see an increase in the percentage of sharp images after a shoot I will eat my camera bag…
The post How to hold your camera for sharpness – Photography for Beginners Series – Ep.35 appeared first on Tea Break Tog.
From The Podcast
Tea Break Tog Photography Podcast
Do you want to improve your photography but are turned off by all the jargon, tech and science? Do you struggle to find the time to develop your skills?My name is Julie Christie and I host the Tea Break Tog photography podcast. My show aims to deliver straight-forward photography lessons, tips and chat to you every week. Episodes are short and focused meaning this is learning that will fit easily around your busy schedule. Let me help you to take control of that camera and capture stunning images!For more information visit www.teabreaktog.com. To get in touch simply click the contact tab on the website or tweet me @TeaBreakTog!Join Podchaser to...
- Rate podcasts and episodes
- Follow podcasts and creators
- Create podcast and episode lists
- & much more
Episode Tags
Claim and edit this page to your liking.
Unlock more with Podchaser Pro
- Audience Insights
- Contact Information
- Demographics
- Charts
- Sponsor History
- and More!

- Account
- Register
- Log In
- Find Friends
- Resources
- Help Center
- Blog
- API
Podchaser is the ultimate destination for podcast data, search, and discovery. Learn More
- © 2024 Podchaser, Inc.
- Privacy Policy
- Terms of Service
- Contact Us