Photographing Children Indoors – How to Find the Light!
In today’s episode I am talking about finding the light when you are photographing children indoors. Where do you find the light? How do you know when you have found it? And how do you use it when you do find it? Yes, it’s better on the podcast but feel free to read it instead 
This is definitely my arena. I love to photograph children above all other subjects. I love kids. I love how much fun I have with them, I love that they don’t have the hang-ups that us adults have and I love that they challenge me! All. The. Time. When you photograph children you have to be so much more than a good photographer. You have to understand kids and how their little minds work and you have to connect with them on their level and make them trust you. You could be, technically, the best photographer in the world but if you can’t relate to kids then you will not be able to create beautiful images of them.
A huge challenge when it comes to child photography is capturing them indoors. Outdoors you have lots more space to work with and much larger areas of good light to place them in. You can keep your distance and shoot lots of action. I am going to delve into the outdoor stuff at a later date though, because I know that the thing you all struggle with most when photographing kids is capturing them indoors.
Am I right?
The first and main issue here is ‘finding the light’ and that is what I am going to focus on in today’s episode!
I talk about this a lot during my beginners’ workshops and I talk about it a lot during my 1-2-1 sessions with learners. I mention it all the time in comments on the facebook group. In fact, it is safe to say that I talk about this constantly!
The reason I talk about ‘finding the light’ a lot is because it is EVERYTHING. It is the single most important thing you can do to give yourself the best chance of capturing a great image. You can select the most beautiful subject, the most captivating background, the correct exposure and superb composition. However, if you have chosen terrible light to shoot in then all of that will mean . . . nothing.
Sorry but it is true.
If you are a photographer skilled in using off-camera flash and you have all the necessary gear then you don’t have to worry too much about this. You can simply add your own beautiful light to any scene. But, if like me, you work with natural light then you don’t choose to do that. Available light has to be your first thought. And let’s face it, most learners do not have a good grasp of off-camera flash and they don’t have all the gear yet. They have to learn to work with the light that is already there.
Also, try adding lots of off-camera flash when working with toddlers in a small space. You will need a pint of vodka and a lie down in a darkened room after that shoot  !
!
(N.B. I am going to be doing a show soon on why I believe every learner photographer should develop their natural light skills before going down the flash route – flash is amazing but you will get so more from it if you master natural light first)
Almost daily on social media I see learners posting images in photography groups and asking what went wrong. Why doesn’t the image look as sharp as it should? Why are the colours off? Why doesn’t it look the way I imagined in my head? They have made sure their shutter speed was fast enough, they have checked their focus settings, they used the right white balance setting and they just don’t understand what has gone wrong.
Just for the record, I love to see learners posting images and asking for advice. This is how I learned. If you do this – continue! If you don’t – you should! There are lots of people out there willing to help and share their wisdom with you. It’s a beautiful thing!
Join our facebook group to get involved in this with like-minded learners.
9 times out of 10, I can see immediately what has gone wrong for this person. 9 times out of 10 I can see that they simply chose poor light to shoot in. And this is particularly true when it comes to shooting indoors.
I have lost count of the number of times learners have told me they struggle shooting with natural light indoors. It is such a common headache and I can completely empathise with it. I remember fighting with this too. Missing countless moments indoors, becoming so frustrated by how terrible my images looked in the camera and not really understanding why because I felt my settings and shooting technique were right at the time.
Very demoralising indeed!
So I am going to share with you what I have learned since then and how it changed my indoor photography forever.
Just for the record, I am talking about natural light photography during the day in this episode. I’m not going to cover flash or artificial light here at all. That’s a whole other subject…
1. Choose your room carefully
Don’t simply choose the prettiest room or the brightest room. Often I go to clients’ homes to take their family portraits and they show me into their favourite room or their largest room or their brightest room – only to have me turn around and say I can’t use it! I always tell them ahead of the shoot that I will have to look around and that they might be surprised with the room I select. This is because I am looking first and foremost for good light.
But what does that even mean? How do you know if a room has good light or not?
Well, the light will change depending on the time of day and it will change depending on the weather, but, if you are shooting with natural light and not flash then it has to be window light. My favourite light source!
2. No direct sunlight shining in
I usually try to choose a room with no direct sunlight shining in. The minute you have sunlight shining into a room you give yourself more work. Why? Because you will have lots more contrast all over that room. If the sun is shining on light coloured items in the room then they are going to be very, very bright and distracting in your image. If your subject moves into the sunlight they are going to end up with harsh shadows across their face and squinting eyes. There is also quite a yellow tone to a sunlit room which can be quite unflattering to the skin.
That’s not to say you can’t create a beautiful image in a sunlit room but you definitely need to know what you are doing. You need to be skilled at controlling and manipulating that strong light. I am a big believer in learning and developing your knowledge and skills using light that is easier to work with first. If you do this you will build up to working with challenging light with much more confidence.
Also, let’s say you are working with children in that challenging light. This makes your job twice as difficult! Kids do their own thing, you have to work around them and be willing to adapt and sometimes even flip everything on its head. Add some tricky, strong light to that scenario and (well, do you remember that pint of vodka?)
So let’s think about a very sunny day. There is an abundance of light. You don’t want to look for the brightest room. It will actually be far too bright. You want to find a room with some nice, cool light coming in through a window. If there is no sunlight coming in then that means the light is being filtered by something. Perhaps by the clouds or trees or a building,
Trust me, filtered window light is beautiful!
If you just can’t find a room with no sunlight shining in then you can clip lots of layers of voile over the window to filter the sunlight. This works really well. Or if there is sun shining in one side of the room and not the other – block that side by closing the curtains or placing something over the window.
However, if it is a very overcast day then you are going to want to select the room with the most light entering which will likely be the room facing where the sun is (albeit behind all those clouds). The other rooms will likely be too dark on a day like this.
3. A room with windows on one wall only will be easier to work with
If the room you choose only has light entering from one side you will have much more control over that light. You know where it is coming from and you know where it is landing in the room. You can then use it to make your subject look wonderful! If you have light invading your scene from other angles then you will have to work much harder to find the best light for your subject. The light on their face will not be as flattering if it is coming from lots of different directions. Trust me on this.
Remember, this could be as simple as closing the curtains over on one window in the room or, if there aren’t any curtains, placing something against the window to block the light.
4. Note where the light is falling
So let’s say you have found your room. You have light entering from just one side and it is being filtered nicely. The light search doesn’t end there. There is so much more to it than that I’m afraid. You now have to look very carefully at where that light is falling in the room. There will be a pool of light near that window and you will be able to see where it starts to fall away.
When your subject is placed in that pool of light they (and you) will benefit from it! They have to stay in it though.
Move them away from that light and, bang, there goes your image.
So search for it. Take your time with it. To begin with you might struggle to really see it but the more practice you get the easier it will be for you to find this pool of magical light in a room. You will not be able to stop seeing it everywhere you go after that!
5. Find the direction the light is coming from
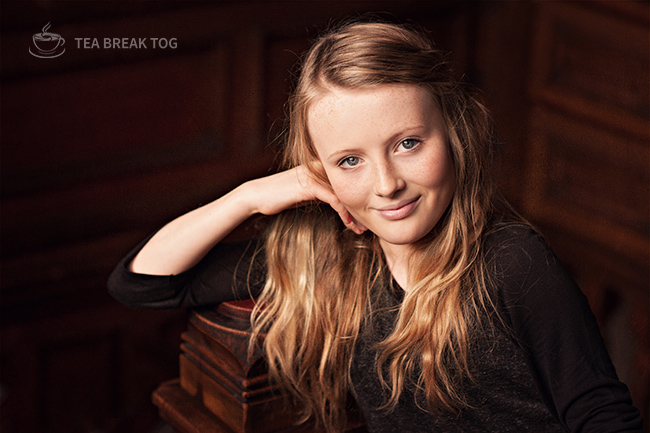
This is important because it will allow you to use the light in several different ways. To understand which direction the light is coming from just turn with your subject until their face lights up evenly. You will know the face is lit evenly when the shadows on it are at a minimum. The light is much the same on their cheeks, chin and forehead. They will also have beautiful catch lights in both eyes.
Catch lights are so unbelievably important if you are going to be creating a photograph in which the subject’s face plays a big role.
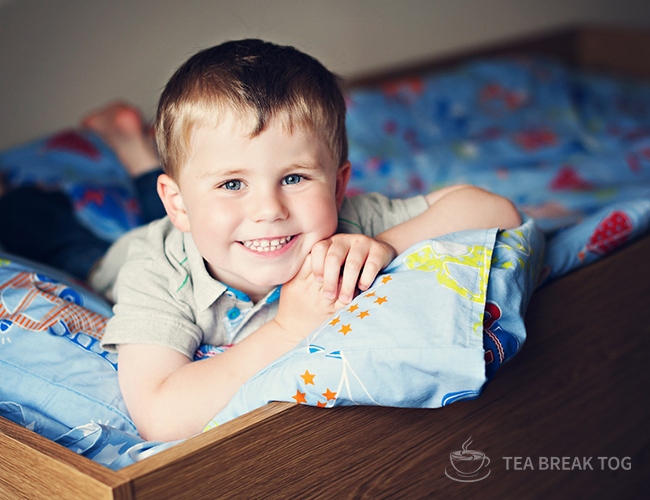
Remember those catch lights!
If there are no lights in your subject’s eyes they look dull and lifeless. Always look for them when you are photographing people.
So when your subject’s face is evenly lit with catch lights in both eyes – you have found your light. That is the direction it is coming from – right behind you, the photographer.
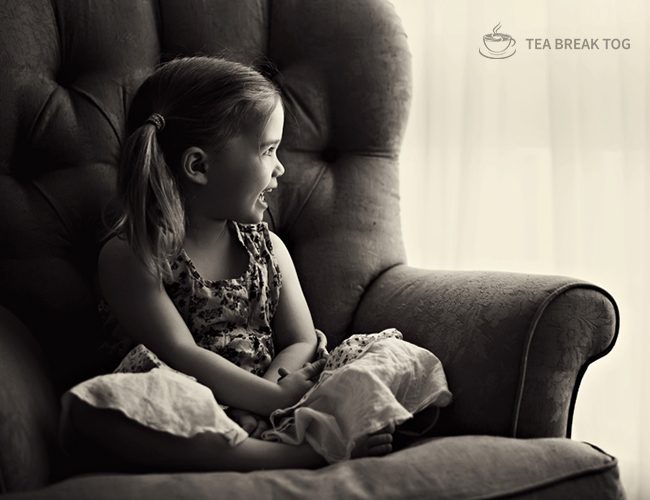
You can now use this light to illuminate your subject from the front, just as you are (taking care not to block the light hitting your subject). But you can also step around your subject and use the light from the side to create shadows and contrast. Or you can even move right around and shoot into the light to create backlit images. (I am going to be doing a lot surrounding the use of light from different directions on the facebook page over the coming weeks so make sure you pop by and ‘like’ the page so you can follow the hints and tips.)
6. Distance from the light source matters!
If your subject is too close to a bright window then they might end up with very bright highlights on their face and if they get too far away from that window light their face is going to darken and those all-important catch lights will disappear. So be aware of the distance you have to work with. Do this by studying your subject’s face. Depending on the room you could have quite a small area of ‘good light’.
Again, with practice you will see this quickly and easily.
7. Stop shooting in bad light!
If your subject moves away from the ‘good light’ you have taken great care to find, stop shooting. I am saving you so much frustration with this tip. If you are shooting with purpose (which means you are shooting to create photographs, not take snapshots) then you do not want to take a shot in bad light. You will be so disappointed with how it turns out.
Your subject might have the cutest expression on their face and they might be composed perfectly in the scene but there will be something that stops you from loving that photograph – and it will be the light it was captured in.
Of course there will be times when you just want to capture a moment and you don’t really care about technicalities. I feel like this every time my kids have birthday parties. The places they have them in always have terrible light and busy backgrounds. At times like this I don’t care about the light the kids are bathed in. I am there to capture memories not create a masterpiece! In situations like that I use my iPhone or if the light is too awful for the iPhone then I use my camera on a semi automatic setting like aperture priority and I just shoot.
But that is not what we are talking about here is it? We are talking about shooting with purpose to create. That is very different. In that case your mantra has to be;
‘good light or no shot’
Having said all of that, I will end on this;
Remember there are no rules in photography, just tips. Sometimes you will ignore all of them when you have a specific purpose or creation in your mind!
Feel free to do this whenever you bloody like! Don’t listen to anyone who tells you any different.
I know what you are thinking now. I do!
How do I get young children to stay in good light long enough for me to take their photographs!?
Yes, this struggle is real. Child photography is so difficult for this reason. If it was as simple as just switching to auto and shooting then everyone would be doing it!
There are loads of hints and tips I can share with you on this subject though and I am going to do just that on Wednesday!
How to get kids to stay in good light whilst shooting indoors! Join me!
We will also be talking about how to prepare for a shoot like this. It’s all in the prep!
For now, give the facebook page a like so that you can follow the videos I am going to share there over the coming weeks. I would love it if you tried some of the tips I am going to share both on the podcast and on social media and uploaded your own efforts!
The post Photographing Children Indoors – 7 tips to help you find the light! – Ep.26 appeared first on Tea Break Tog.
From The Podcast
Tea Break Tog Photography Podcast
Do you want to improve your photography but are turned off by all the jargon, tech and science? Do you struggle to find the time to develop your skills?My name is Julie Christie and I host the Tea Break Tog photography podcast. My show aims to deliver straight-forward photography lessons, tips and chat to you every week. Episodes are short and focused meaning this is learning that will fit easily around your busy schedule. Let me help you to take control of that camera and capture stunning images!For more information visit www.teabreaktog.com. To get in touch simply click the contact tab on the website or tweet me @TeaBreakTog!Join Podchaser to...
- Rate podcasts and episodes
- Follow podcasts and creators
- Create podcast and episode lists
- & much more
Episode Tags
Claim and edit this page to your liking.
Unlock more with Podchaser Pro
- Audience Insights
- Contact Information
- Demographics
- Charts
- Sponsor History
- and More!

- Account
- Register
- Log In
- Find Friends
- Resources
- Help Center
- Blog
- API
Podchaser is the ultimate destination for podcast data, search, and discovery. Learn More
- © 2024 Podchaser, Inc.
- Privacy Policy
- Terms of Service
- Contact Us


