Taking photographs of kids indoors – 10 ways to prepare for success!
We are sticking with the theme of taking photographs of kids indoors but this time the focus is on how to prepare for success. I am going to share with you ten great tips which will almost guarantee that you walk away with some winning shots!
On Monday I spoke a lot about the fact that before you even press that shutter button you have to ‘find the light’. There is a lot to this and it is super important so please do give that episode a listen if you haven’t done so already.
- Do a mood check!
For me, creating images with an emotional and temperamental toddler is right up there with taking a cold shower or eating snails. It is not something I want to put myself through at all. Just because you want to take photographs and the light is ‘just right’ doesn’t mean your little angel has bought in to this experience too!
Save yourself some stress and think about whether your little one is in the right frame of mind for this or not. If not then you might want to have that pint of vodka waiting again…
Obviously this only works if you are taking photographs of your own kids. A bit trickier with other people’s sprogs but if you follow the tips below you might still be able to make the best of a bad mood!
Gather the things you will need
Make sure that you have all the things you might need close to hand. When I am working with young kids I like to have books they enjoy, favourite toys (more about that in the next episode), tissues for snotty noses and my iPhone to play songs they love. A suitable bribe might be on this list too . . .
Plan your reward (bribe) in advance!
Kids are bribed all the time. We call them rewards but let’s admit that they are bribes! They can make life that little bit easier at times can’t they? But the best bribes are the ones you have had time to think about. Those ‘spur of the moment’ bribes often end in disaster.
Like when you tell them they can go swimming afterwards but you forgot that you are all expected at Great Aunt Bessie’s house to visit, or when you tell them they can have an ice cream cone but there isn’t any ice cream in the house and the shops are closed. Not good!
You need to think about your reward in advance and make it appropriate to the child or the children you are photographing. It doesn’t have to be sweets but if it is then make sure that you actually have them available! And make sure you make it very clear that they are for after you are all finished and not during. Never give in and give them a sweet before you are done. The whole shoot will fall apart quicker than you can say ‘cheese’!
I find the best rewards are not edible though. The most effective rewards are activities and they are discussed with the kids beforehand. A simple trip to the park, a family board game, baking a cake or having a friend round to play are all great motivators for your little subjects to behave well for you during your shoot.
If you are taking photographs of someone else’s children then it goes without saying, I hope, that you let their parents decide whether a bribe is necessary and what that bribe should be. Could be a tad awkward if you don’t!
I’m a big fan of the bribe before I take photos of kids. However, some kids are just too young to understand them or others just don’t respond well to them at all. Parents know their own children. Don’t use a bribe unless it actually works with that particular child.
Find the light beforehand
On Monday I talked a lot about how you go about finding the light to capture children in when you are indoors. If you listened then you will know that there is a lot more to that process than you perhaps initially thought. (If you didn’t catch it – be sure to have a listen).
Something positive is that you don’t actually need your young subjects to be with you when you do this. They can be playing, eating or destroying the place (as they do) whilst you find your perfect spot. The last thing you want is to have them sitting waiting whilst you seek out the ideal light because, by the time you find it, they will be bored to tears and ready to make the whole experience hell on earth – the little darlings!
Check your setting
Look around at what is going to be in your scene. Is there anything distracting that can be moved? If so, move it all right out of the way. Close any open doors and tidy up any clutter.
Equally, is there anything that might look good in the setting? Add items that will work well. You might want to bring in a nice chair or add some complimentary colours to the background.
If, like me, you have a lot of stuff going on in your home then buying a good backdrop will make a huge difference. I have several strong paper backdrops I use to cover up windows, messy shelving or other clutter. It’s a lifesaver at times.
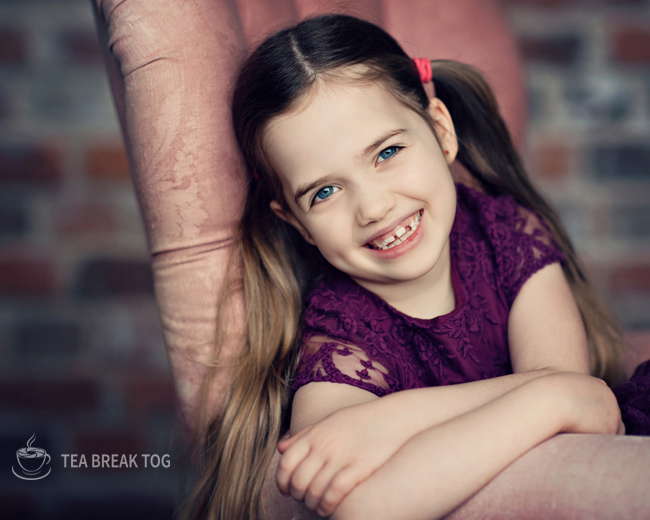
All you need is a simple backdrop stand, nothing fancy, and one backdrop that you like. I have several. The one below looks like an exposed brick wall in photographs. But I also have a couple of floral ones ones which look like wallpaper and some plain ones for simpler shots.
Doing a google search for photographers backdrops will give you a good idea of just how easily available and affordable these are.
Adjust your exposure settings in advance
Once you have found some gorgeous window light to work in and checked your setting then it is time to meter the light and find the exposure you need for these shots. If you listen to the podcast you will know that I recommend you always spot meter the light from the brightest part of the face in these situations. When you do this you will find the perfect exposure for this pool of light and you can keep your settings the same throughout the time your subject is in this particular area. (as long as the light remains constant of course).
If my subjects are very young I won’t even use their faces to meter the light or check for catch lights etc. I use an adult or even a doll instead and I just let the kids continue to do their own thing. Anything to reduce their time in front of that camera is a good thing believe me!
If metering the light is not something you are a familiar with then you should definitely check out my Auto to Manual for Beginners course. It’s the perfect way to learn this quickly and thoroughly.
Finding your light and sorting out your exposure settings in advance like this, and without involving the kids, will mean that you are not asking for their co-operation for a second longer than necessary. When you begin the shoot you should be 100% ready to go in terms of light and camera settings.
Have a conversation!
No matter what age the kids are, if you don’t know them overly well beforehand, then you must make sure you have a chat with them first. Honestly, even babies! Get down to their level and speak softly to them with a warm smile on your face. If they are at the conversation stage, ask them about themselves and let them tell you whatever they want to. If they are shy, give them some space and some time to get used to you in the room.
Whether they are your own kids or someone else’s, if they are old enough to understand, talk them through what is about to happen. Talk to them about where you have found this gorgeous light and tell them you are going to let them have some fun in it! Show them where the light starts and ends so they are aware of the space but don’t tell them that they can’t move from it. It is your job to keep them there and I am going to help you with that in the next episode in this series.
Let them see and touch your camera
If you are willing to, then show your mini models your camera and let them touch it – with the lens cap on! I often let the kids I am photographing look at some images on the screen and I ask them if they would like to be on there. I might even let them take a photograph of their sibling or parent. As long as I am holding the camera with them I really don’t mind.
Of course, you will have to make your own judgment and common sense here but allowing your little subjects to familiarise themselves with this alien object can make your life easier during the shoot.
Be realistic about time
The time you are going to have before the shoot goes downhill will vary drastically depending on the age of the kids and their temperament. If you go into that shoot expecting to get an hour of perfect playing and sweet smiling and joyful moments then you are going to be crying into your coffee later on!
Kids don’t want to have their photograph taken continuously for an hour. Would you?
Expect your time in this light to be brief and just ensure that you are wasting none of this time at all by following the advice I have given you in points 1, 2 and 3. When those kids are ready to go – you need to be ready too!
This means that even if you only get 5 minutes before little Johnny has a meltdown then at least you spent that 5 minutes shooting and not faffing about with your camera settings and arranging a bribe!
If you go in with low expectations and end up getting 30 minutes of pure gold then HAPPY DAYS – and what are you giving those children because I want some to give to mine! 
Three’s a crowd (and prepping your helper)
An assistant can be really handy when you are photographing kids, especially if your subjects are young. I like to have a helper for sure. However, more than one helper can be hindrance! One other adult or older child in the room is more than enough. Giving the kids too many people to look at or listen to can lead to confusion and upset.
Be sure to prep your helper. Tell them what you want their role to be. They won’t think you are rude – they will just be glad to know how they can assist you!
I always ask that no one but me gives direction to the kids. The last thing I want is for my helper to be speaking to them when I am trying to get them to look somewhere else or for the kids to be getting a telling off from someone when I am trying to capture happiness and joy.
An assistant is simply there to do what you ask them to do. So be sure to let them know what you want from them and use them to make your task easier.
I will go into how you can make the best use of an assistant on Monday when I am going to be talking about how to keep kids in one place long enough to take their photographs indoors.
In the meantime remember to sign up for my window light webinar if you haven’t done so already.
Before I go I have a small request. If you enjoy the podcast on iTunes and have a spare couple of minutes then I would be so VERY grateful if you could leave me an iTunes review. You can find out how to do this in iTunes or from your iPhone or iPad right here.
I know you are all busy so if you take the time to do this please pop me a message and let me know so that I can thank you personally.
Until next time!
The post Taking photographs of kids indoors – 10 ways to prepare for success! Ep. 27 appeared first on Tea Break Tog.
From The Podcast
Tea Break Tog Photography Podcast
Do you want to improve your photography but are turned off by all the jargon, tech and science? Do you struggle to find the time to develop your skills?My name is Julie Christie and I host the Tea Break Tog photography podcast. My show aims to deliver straight-forward photography lessons, tips and chat to you every week. Episodes are short and focused meaning this is learning that will fit easily around your busy schedule. Let me help you to take control of that camera and capture stunning images!For more information visit www.teabreaktog.com. To get in touch simply click the contact tab on the website or tweet me @TeaBreakTog!Join Podchaser to...
- Rate podcasts and episodes
- Follow podcasts and creators
- Create podcast and episode lists
- & much more
Episode Tags
Claim and edit this page to your liking.
Unlock more with Podchaser Pro
- Audience Insights
- Contact Information
- Demographics
- Charts
- Sponsor History
- and More!

- Account
- Register
- Log In
- Find Friends
- Resources
- Help Center
- Blog
- API
Podchaser is the ultimate destination for podcast data, search, and discovery. Learn More
- © 2024 Podchaser, Inc.
- Privacy Policy
- Terms of Service
- Contact Us

