
Dualshock 3 - Replacing Parts / Repair
Dualshock 3 - Replacing Parts / Repair
Dualshock 3 - Replacing Parts / Repair

My Dualshock 3’s analog sticks have gone through many years of wear and tear. I decided to replace the sticks and buttons with replacements I bought on Amazon for $14.99. Here are pictures before/after replacing the parts.
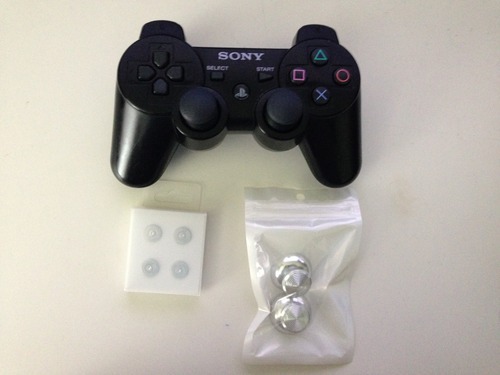

Read more to learn how to do it yourself at home.

1) First, you have to unscrew the five screws connecting the two sections of the controller. Be careful, because the screws are very small. For this step, I used a Philips #0 screwdriver.
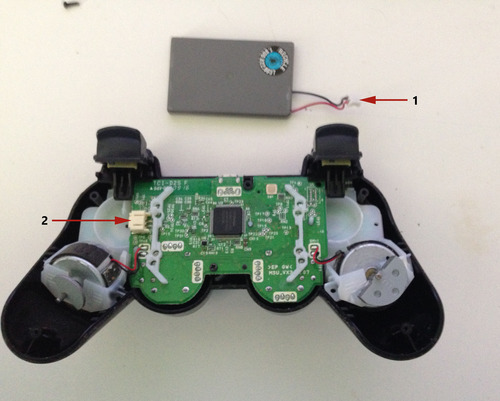
2) For the next step, you have to detach the battery pack (1) from the motherboard assembly (2). Be careful when detaching, you might bend the connecting pins.
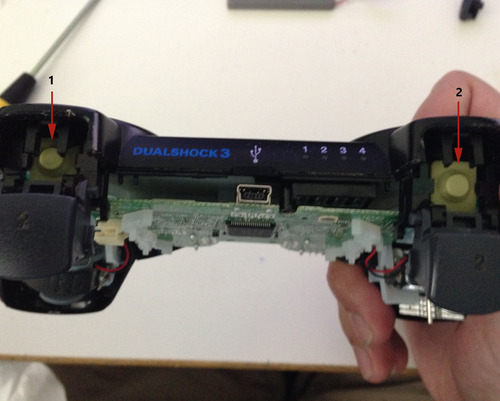
3) Next, you should pop out the R1 (1) and R2 (2) buttons. When putting it back together later, make sure the rubber circles line up right below the buttons before snapping them back in.

4) Separate the motherboard assembly from the front of the controller. At this point, you should see the various areas where the buttons are inserted. You can replace the directional pad (1) or face buttons (2) by simply removing the padding and switching out the buttons.

5) The analog sticks (1) & (2) are easy to pop out and replace.
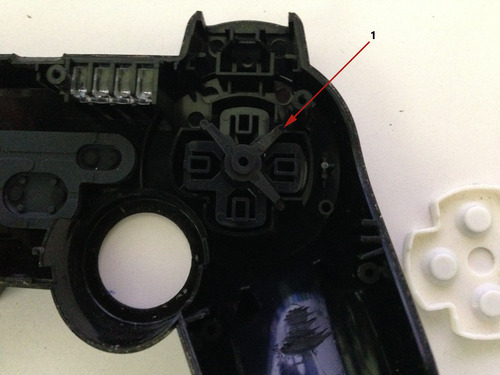
6) Putting the controller back together is as simple as following the steps backwards. If the buttons fell out during disassembly, make sure the part behind the directional pad (1) is pictured as shown.
If you found this helpful or have some advice on how this can be improved, leave us a comment on the post.
Join Podchaser to...
- Rate podcasts and episodes
- Follow podcasts and creators
- Create podcast and episode lists
- & much more
Episode Tags
Claim and edit this page to your liking.
Unlock more with Podchaser Pro
- Audience Insights
- Contact Information
- Demographics
- Charts
- Sponsor History
- and More!

- Account
- Register
- Log In
- Find Friends
- Resources
- Help Center
- Blog
- API
Podchaser is the ultimate destination for podcast data, search, and discovery. Learn More
- © 2024 Podchaser, Inc.
- Privacy Policy
- Terms of Service
- Contact Us